Laughing Moon’s #113 Pattern (Men’s 1900’s Corset)

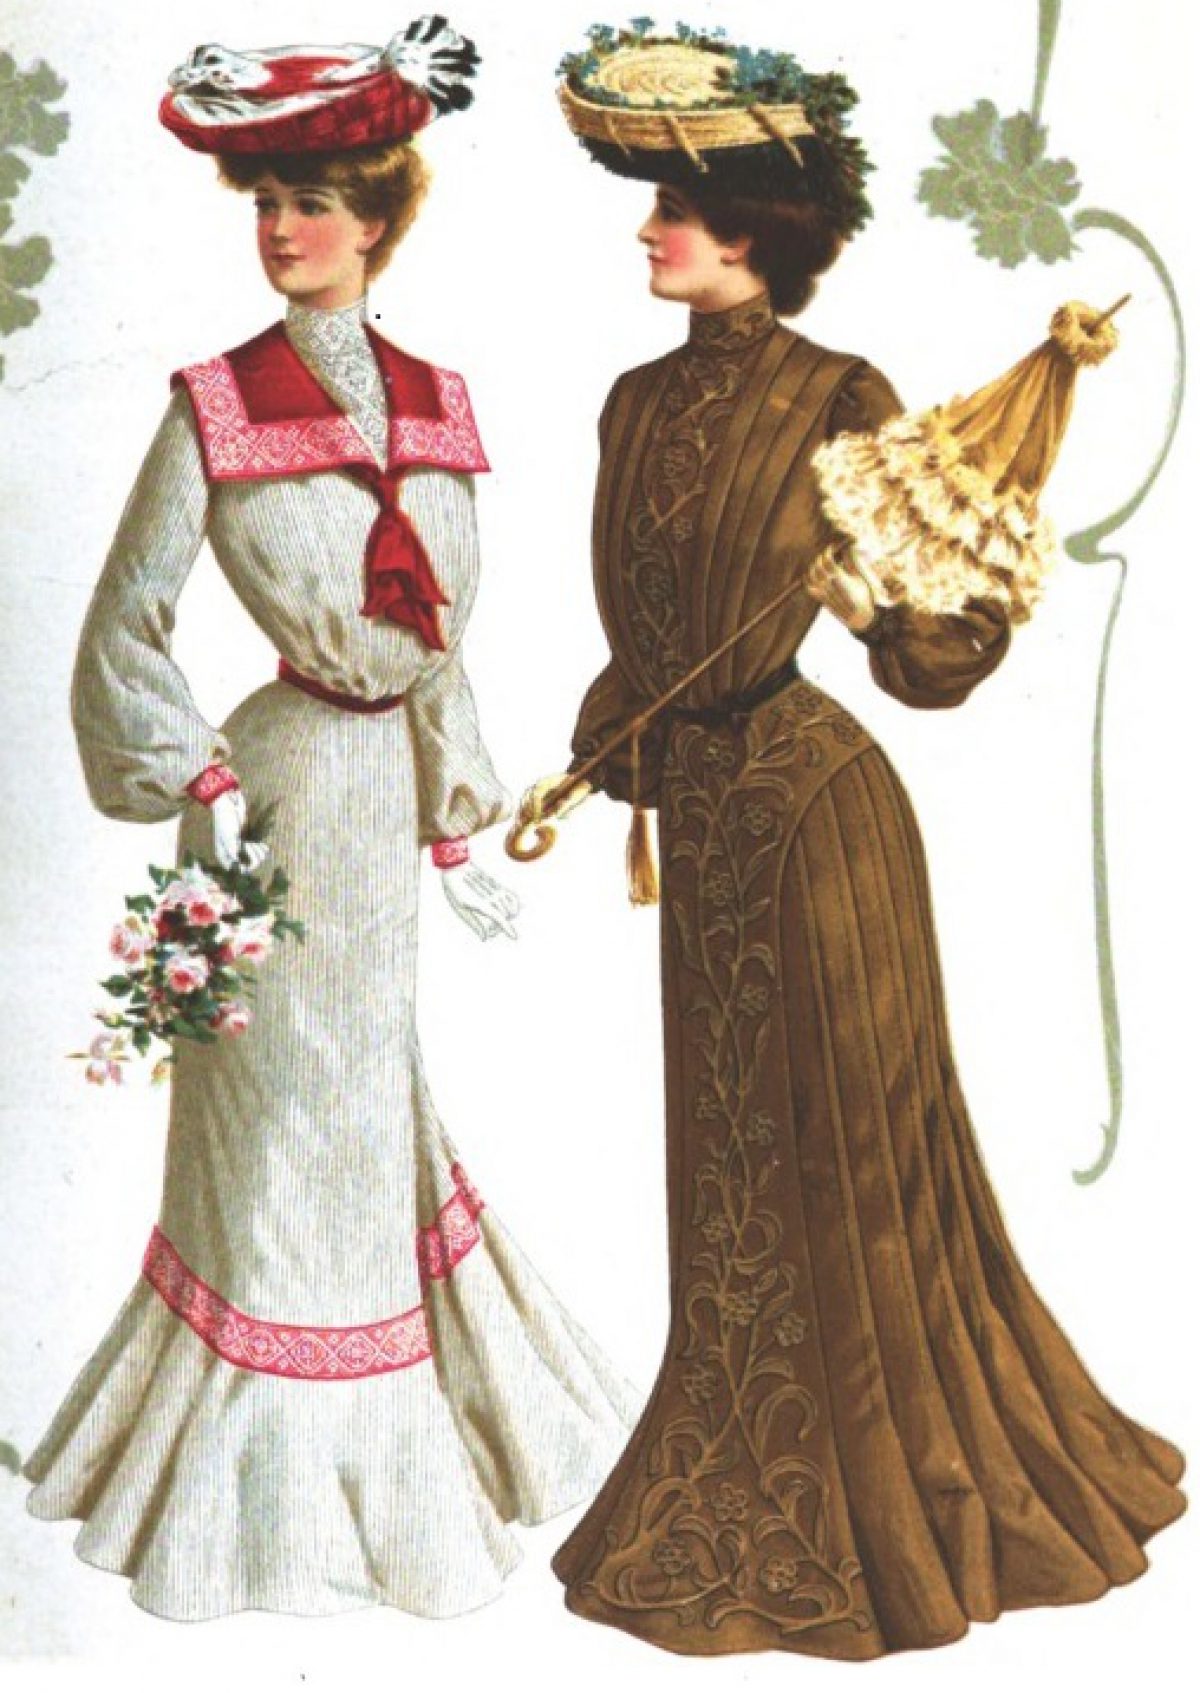
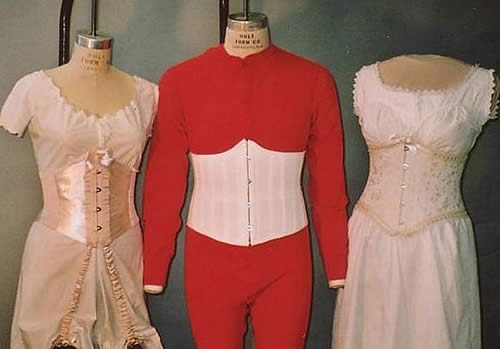
This is a review for the wonderful Laughing Moon #113 pattern. Men started wearing corsets in the early 1800’s (I think I read somewhere that they started as early as the 1790’s, but I’m not certain). During the Regency era men were wearing them for a small waist, back support/protection, and to help with the fit and shape of the popular silhouette of the time. Later in the Victorian and Edwardian era’s, men’s corsets were used for a ‘slight’ narrowing of the waist, fit, back support, ect…

Material: 100% cotton coutil and 100% silk dupioni

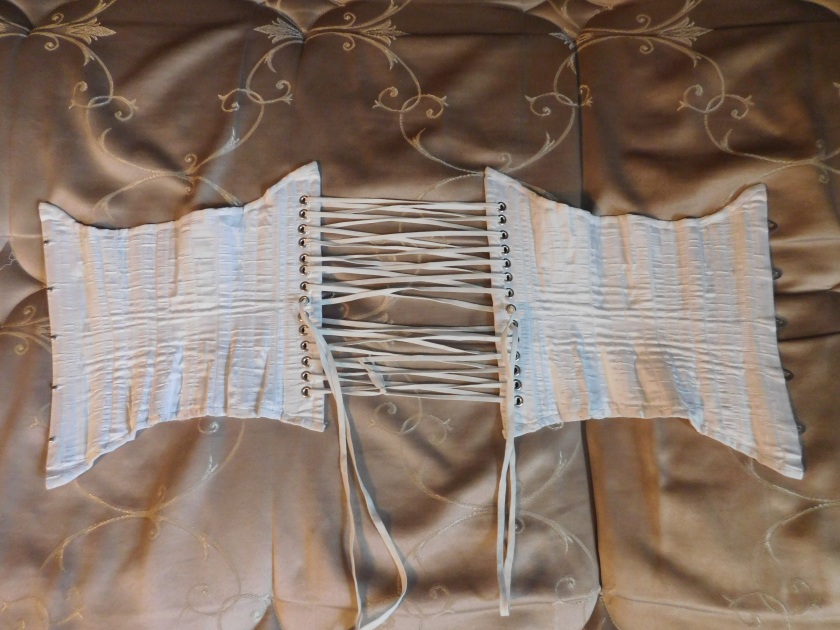
Pattern: Laughing Moon #113

Year: 1894-1909

Notions: Metal busk, metal grommets, spiral steel and metal boning, 100% cotton thread, 100% cotton lacing cord, 100% cotton boning tape, 100% polyester twill tape (grimace)

How historically accurate is it? I would say this is about 97%. The construction methods and materials are authentic to the time period. The only unauthentic thing is the polyester twill tape.

Hours to complete: unknown

First worn: Spring of 2016

Total cost: Unknown

laughing moon men's corset

This pattern was spectacular!!! I’m giving it 5 stars! I had already made a corset using Jennifer Rosbrugh‘s AMAZING corset sewing class, so I knew the jist of how they go together which helped a lot! The instructions were extremely clear, they came in a little booklet, which in my opinion is better than a bunch of papers stapled together! The fit was incredible, even in the mockup! I couldn’t have dreamed for a better fitting corset!

The support of the back is amazing, and the garment is extremely flexible. I can easily bend over to pick things up and even do sit-ups in it! (Although I wouldn’t recommend doing sit ups in one! I only did it to prove to my friends that it’s possible).

DSCN2127

I wasn’t going for the cinched waist look, as I was trying for a more 1900’s silhouette than a Regency silhouette, and also because I wanted to use it under my modern clothes to correct my posture and give me back support, but this corset can cinch, I had to try it once and I found that with this corset I can go from 29″ to 26″ very easily (Which is perfect for that Regency pigeon breasted look men were going for), and my sister can go from 30″ to 25 1/2″ in it as well.

I did make this corset out of coutil and an outerlining of silk dupioni. If you are going to be wearing a men’s corset under jeans and a shirt don’t make the outerlining of silk dupioni! The jeans have over time rubbed the silk threadbare and it started fraying in less than three weeks of wearing it. It now looks like a well used antique 🙂

In conclusion I will definitely be using this pattern again in the future and I already have a couple of male friends asking me to make them one as well, simply for the amazing back support and since it can narrow the waist into the now popular “body builder” torso look, which can help the chest look bigger. It was a breeze to sew and is so incredibly comfortable!!! Thank you JoAnn Peterson for making this wonderful pattern! It was the only one I could find for a historically accurate men’s corset!

1960’s skirt

In my last post here I spoke about a 1950’s era blouse that I had sewn. At the end I mentioned that I needed to make my customer a 1960’s skirt yet. So here it is.

img_0336

The Front

img_0337

The Back

I do not know what the fabric was, since I did not do the purchasing, but it was incredibly soft and felt like wool on the outside and felt rather bumpy on the inside. The dress closes with a zipper on the left side and there is a 6 inch vent in the back of the skirt.

The pattern was Simplicity 2154. This was a very easy pattern to use.Simplicity Pattern 2154 Misses' & Miss Petite 1960s Vintage Suit

Simplicity #1460 Patttern or a 1950’s/1960’s Blouse

This summer in August I met a wonderful lady at our county fair. I met her while working at the Baldwin Reynolds House Museum stand. During our conversation he asked if I could sew her a 1950/1960’s blouse, because she couldn’t find any seamstresses or tailors in Pittsburgh. I consented and here is how it turned out.

The fabric was lace (I do believe it was polyester, but it was still gorgeous) from the David Tuturrea Bridal Line.The fabric cost about $24.00 a yard! Needless to say I made a very careful mockup to make sure that I didn’t ruin the wonderful fabric. There are also four beautiful, plastic, crystal buttons that add a nice touch. The pattern I used was Simplicity’s #1460

  Simplicity Pattern 1460 Misses' 1950s Vintage Peplum Tunic & Blouse

The garment was very fun and enjoyable to construct! I now need to sew a 1960’s skirt for my customer which should be a lot simpler.

Past Patterns Girls’ Tucked Over-Blouse or Jumper: circa 1910

I had the delightful experience this summer to sew a girl’s mid Edwardian dress from a copy of an original pattern for my little sister. The pattern was Past Pattern’s Girls’ Tucked Over-Blouse or Jumper: Circa 1910. I wanted to be as historically accurate as possible with this dress, especially since it was a copy of an original pattern.

I loved making this dress! It was scary though. I had never worked with a pattern that had about two rows of writing for the instructions and the pattern pieces only had dots to signify where tucks, seams, and notches were. But after I fully understood it it was a breeze. I also made a mockup, which should be a must if one isn’t sure about a pattern or working with an antique pattern. There were a few times I didn’t understand what the instructions were saying, but Saundra Altman was always there to answer questions through email or phone. She explained things very clearly to me.

I wanted to make this dress because my sister happened to be the exact measurements for the dress, and I am completely in love with the Edwardian era and the Anne of Green Gables movies and thought that this was to good of an opportunity to miss. I finished the dress on our family trip in June the day before we went to visit the Biltmore estate. I got to convince my sister to take a few pictures there, although I was sad that I didn’t have authentic foot wear for her so her pink sneakers screamed modern!

Notions: Cotton lawn, indigo cotton/linen, and historically accurate Dudley buttons from Renaissance Fabrics, authentic mother-of-pearl buttons, hooks and eyes, and lace (the lace is the only part of the dress that I’m not sure is accurate to the time period). I hand finished the garment also for historical accuracy.

Here are some notes about the dress (some of them may have already been written above in the “notions” paragraph): The dress is made of cotton lawn, indigo cotton/linen, and lace. The back of the guimpe (under bodice) closes with 30 hooks and eyes and a waist tape, and the over-blouse and skirt close with 5 authentic mother of pearl buttons, a Dudley button, and 12 historically accurate snap fasteners. I tried to be as historically accurate as possible, I even went so far as to sew the button holes and hem the dress by hand, and hand finish or pink all seams. There are 20 tucks on the front of the over-blouse, and 22 on the back. The skirt has 24 pleats.

dscn2152

dscn2149

DSCN2155.JPG

DSCN2156.JPG

dscn2167

dscn2168

DSCN2172.JPG

DSCN2175.JPG

DSCN2177.JPG

dscn2183

I nearly croaked when I saw how badly her sneakers clashed!

DSCN2184.JPG

Late 1890’s embroidered Petticoat and Matching Corset Cover

I’ve been constructing a late 1890’s dress for my sister over the past year, and this summer I finished her top petticoat and hand sewed a corset cover to match.

Supplies for Petticoat: 100% stiffened cotton organdy from vogue fabrics, DMC cotton embroidery floss (I read somewhere that this kind of floss was available back in the early 1890’s), and 100% cotton thread. Pattern: Truly Victorian #170

Supplies for Corset Cover: 100% cotton lawn from Renaissance fabrics, DMC cotton embroidery floss, 100% cotton thread, beeswax, vintage lace my grandmother gave me, vintage mother of pearl button. Pattern:Past Patterns #108

I made the petticoat first. After reading Jennifer Rosbrugh’s post about The Costumer’s Dream Fabric I decided to take the plunge and try organdy. I loved working with it. When I received the fabric it was really stiff, but after washing it it was just slightly stiff. It’s not stiff enough for what I want so I’ll probably starch the petticoat anyway. The embroidery is done by hand and I came up with the design after watching some youtube videos on different stitches. The petticoat is also hand finished, I even spent a whole day hand hemming the 28 ft. hem.

IMG_0723

The Finished Project

IMG_0724

Close up of the Embroidery

IMG_0933.jpg

The corset cover came next. I used view A. The embroidery was a lot of fun to do and was well explained in the instructions. I had a few questions about the assembly of the garment and it was wonderful that Saundra Altman was always ready to answer a question over the phone or through email. She explained things very clearly and was extremely helpful! The instructions said that the most historically accurate way to sew the garment was by hand, so I did. It took me about two weeks sewing about 2-4 hours a day. After I completed it I entered the corset cover and petticoat in the Crawford County Fair competition and won first place.

IMG_1190

The Front: The corset cover doesn’t fill out into a pigeon breast on the mannequin like it would on a real person.

IMG_1193

The back: You can just see the 9 pin tucks down the back. Again it doesn’t sit well on the mannequin.

IMG_1196

Close up on Embroidery: Those are real eyelets

I had so much fun making these two garments. I learned the joy of hand sewing and embroidery.

Wizard of Oz Emerald City Dress for the Academy Theatre

About 3 weeks ago I decided to volunteer to make a dress for Academy Theatre’s “The Wizard of Oz” after talking with a girl who was acting in the play and becoming acquainted the the costume designer hired for their production of “The Music Man” by giving her a tour of the mansion that I work at. The costume designer for “The Wizard of Oz” gave me this prom dress and gave me a vision for how she wanted it transformed.

The idea was to transform it from a prom dress into a Victorian, Steampunk, high society, yet gaudy gown. They wanted the train removed to keep the girl and her dance partner from tripping over it while they danced, and they wanted a puffed sleeve! The dress also needed sleeve straps, and I needed to pull out the zipper in the back and install lacing instead.

After about 5 days of working on it, which consisted of about 1-4 hours per day, I had it completed.

img_0100img_0099img_0104

img_0105

The Lacing

Changes included; long puffed sleeve (1 yard) with ruffle at wrist, lacing and panel behind lacing, chopping of the beautiful train and turning it into a draped overskirt secured by golden rosettes of puffed tulle, shoulder straps, a small golden rose puff beside the leg-o-mutton sleeve, and adding a pleated underskirt because I cut the skirt to short (this actually turned out to look very nice, the next pictures will show it)

After I handed the dress over the costume desinger made some changes to it that I thought made the dress look a lot better. Those changes included; taking of all the golden rosette puffs and replacing them with green flowers, pushing the puffed sleeve upward so that all it’s thickness was around the armscye, replacing golden ruffle at the wrist with a green ruffle, and adding a belt with black and white stripes (I don’t have a picture of the belt, it was only worn in one scene).

Here are some pictures of the dress being worn at the production.

wizard-of-oz-dress

The girl kneeling on the left is wearing the dress. You can see that the gold rosettes and sleeve ruffle have been replaced, also the puffed sleeve is pushed up.
img_0134

Here is a closer version. Again the girl is on the left. You can see the underskirt in this picture, the puffed sleeve pushed up, the sleeve ruffle, and the green flowers. She is also wearing a belt. I love the hats!

I had a wonderful time altering this dress and letting my creativity flow! It was really fun to not have to follow rules of historical accuracy for one, and be able to use crazy fabrics! The dress looked fabulous on stage! When the girl would twirl the draped overskirt would flare and swirl out (It looked really cool!). It was so much fun getting to meet these people and spend a few evening hand sewing while watching them practice, and I must say that the play was stunning and phenomenal! Everything was marvelous from the set to the costumes to the beautiful voices of the singers! I am very glad I got to have this experience!Image result for the academy theatre, meadville pa

The Academy Theatre is a beautifully preserved building from the Victorian age. I just wish I had a picture of the interior because it’s 50 times more beautiful than the exterior. There is a chandelier and a lot of gold leafing.

Here are a few pictures from the production

The girl on left, her dress was gorgeous!

This dress was just stunning! The blue reminded me so much of Lily James’ dress in Cinderella!

I loved that they used a real dog for the show!